In this blog post, we will be discussing how to install TestNG for Selenium Webdriver in Eclipse IDE. It is very easy to install TestNG, as it comes as a plugin with Eclipse.
Prerequisites for Installing TestNG:
- Successfully installed eclipse IDE.
- Perfectly fine running Internet Connection.
Steps to Install TestNG:
- Launch Eclipse IDE.
- Go to the Help option in the top main horizontal menu.
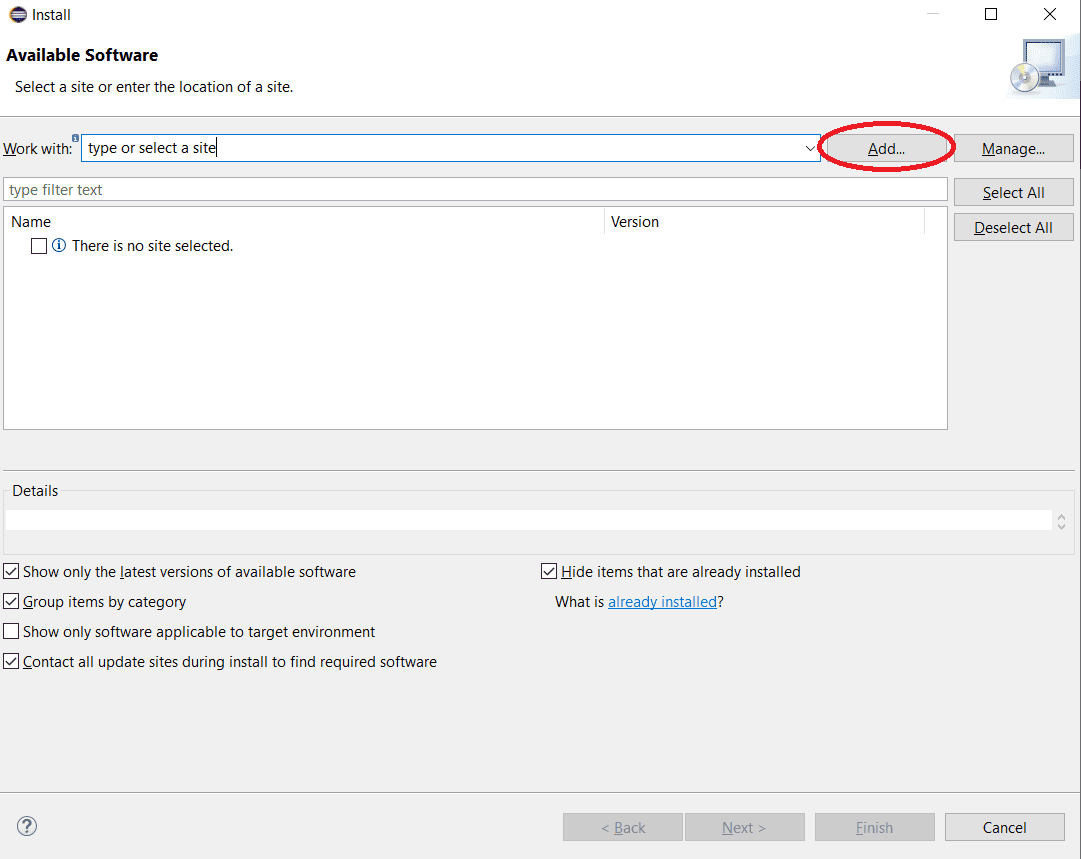
- Select “Install New Software” from the list.
- You will see a dialog box. Click the “Add” button.
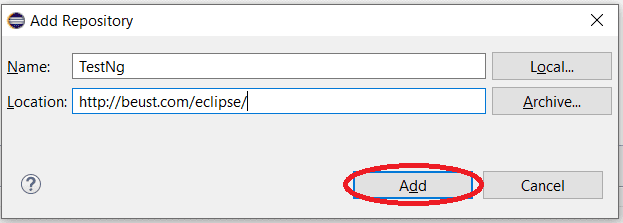
- In the “Name” field type whatever Name you want to give, for example, in this case, I am giving the name “TestNG”. In the location field enter the following URL “http://beust.com/eclipse/”. Click on the Add button.
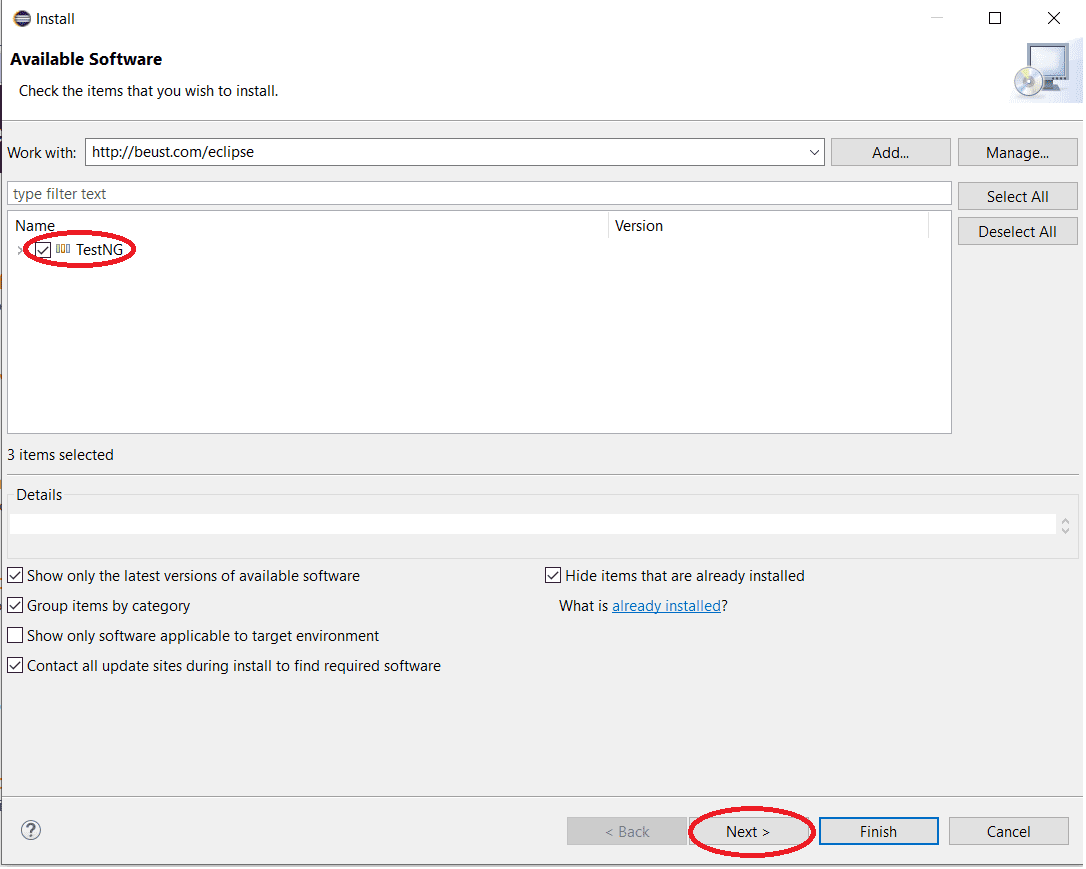
- You will return to the previous window. This time you will be able to see the “TestNG” option in the list of available software.
- Click on the “TestNG” and click on the Next button.
- Click on “I accept the terms and license agreement” and click on the Finish button.
- If you encounter a security warning, click on the OK button.
- Eclipse will take a while to download and install TestNG. You will see a prompt to restart the Eclipse.
- Restart Eclipse and now you are ready for the actual coding.
- After restart to verify the successful installation of TestNG, Right-click on your project and see if TestNG is displayed in the opened menu.
In a way, we aim at helping you Download and Install the TestNG plugin for Eclipse IDE.