A Complete Guide to Why do we need Agile Methodology in SDLC and How is it different from Traditional Model with Pros and Cons of Agile Methodology in SDLC.
...RECENT BLOG
2020 / 2 / 27

2020 / 2 / 27
2020 / 2 / 27

2020 / 2 / 27

2020 / 2 / 27

How to use JMeter Test Recorder
The recorder records the browser interactions with the JMeter. But before the recorder does it job, we need to do some preliminary setup. JMeter's HTTP(s) Test Script Recorder is designed to record test scenarios.
In this blog post, our aim will be to get your system i.e. your JMeter ready for recording the browser interactions. For that you need to do the following:
Prerequisites:
How Proxy Works???
All of you must be aware of How a Proxy actually works.Proxy is nothing but a component that is placed between you and a remote server. What Proxy do is to pass your queries to the remote server and at the same time, it transmits the result sent by the remote server to you. This means if we use JMeter as a Proxy, it can record all of your browser interactions with a server whether HTTP or HTTPS.
You are right, How to use JMeter as a Proxy? The answer is very simple, JMeter Test Script Recorder is designed in a way to provide this functionality of Proxy.
Configure Browser to use JMeter Proxy:
Firefox Setup:
1. Open Firefox.
2. Open Preferences. There are 3 ways to open Preferences.
3. Go to the bottom of the page. Click on the Settings button under the Network Settings.

4. On the new pop up window, check Manual proxy configuration.
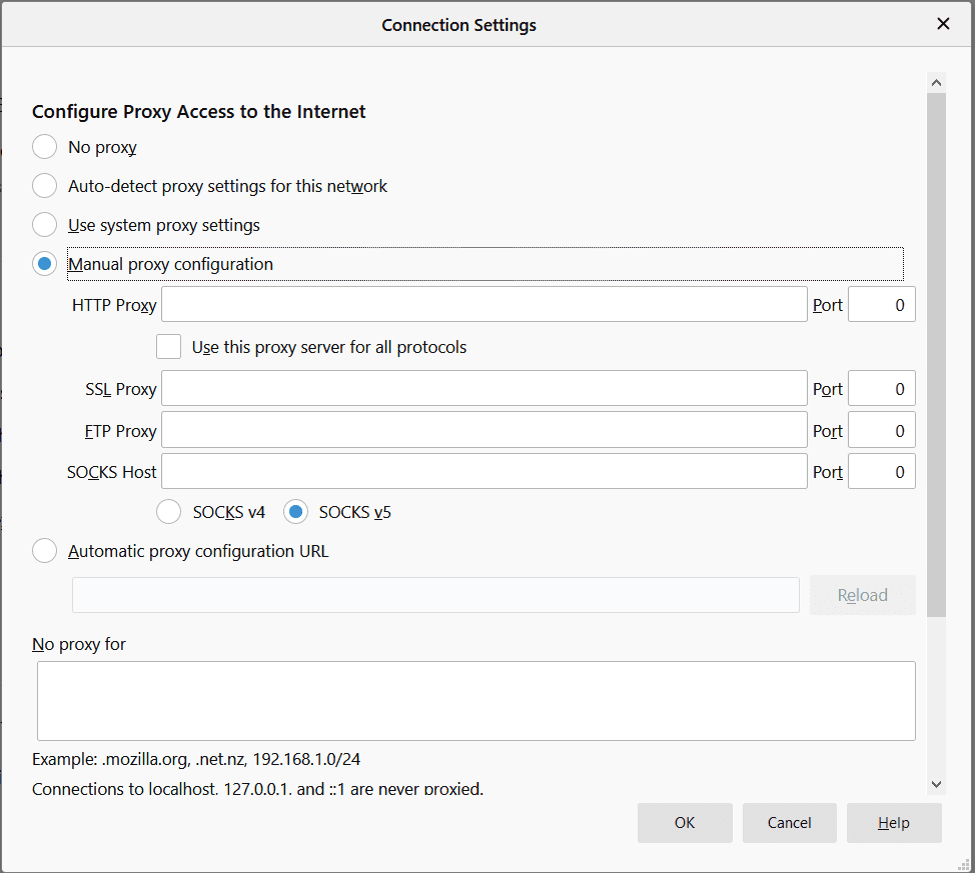

5. Click on the checkbox Use this proxy server for all protocols.
6. Click on the OK button. This should return you to the browser.
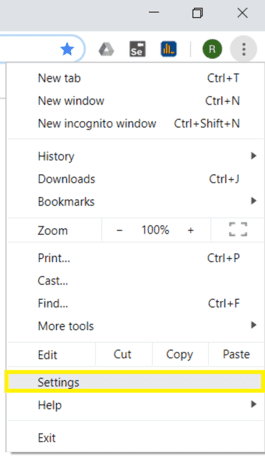
Google Chrome Setup:

HTTP Requests
JMeter Recorder Template is the easiest way to get started with recording HTTP requests.
1. Launch JMeter in GUI Mode.
2. Click on Files → Templates.
3. In the dialog box that appears, select Recording with Think Time in the drop-down list Select Template.
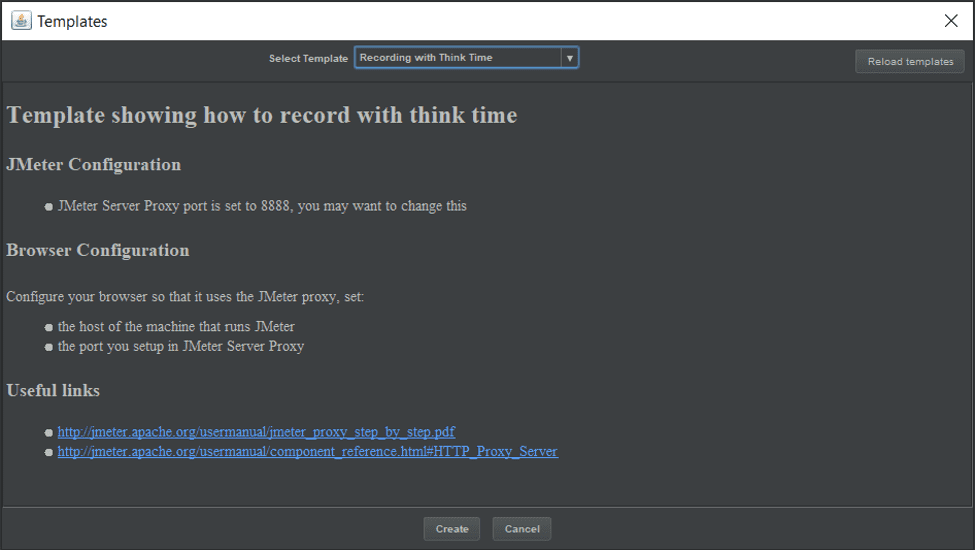
4. Click on the Create button.
5. You will see a list of attributes that you can configure.
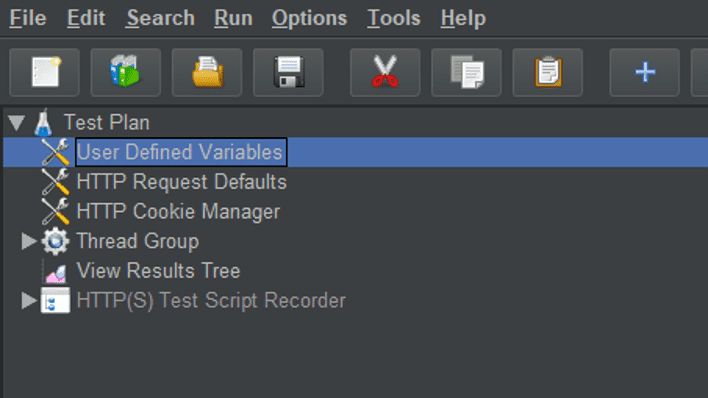


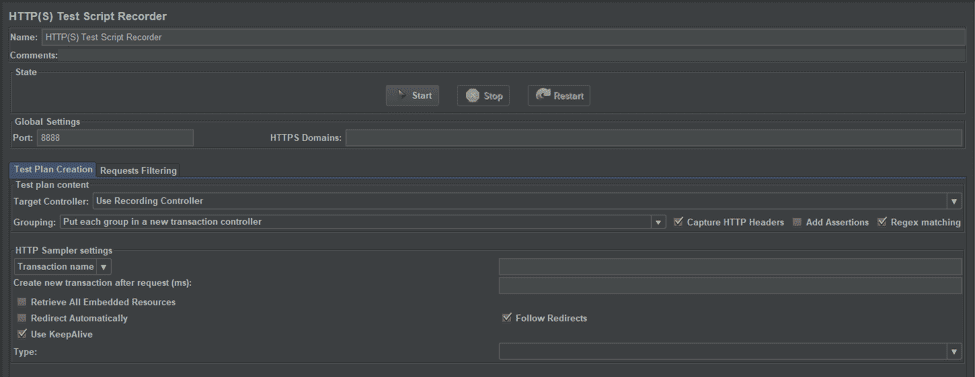
HTTP Test Script Recorder Settings:
If you carefully observe the HTTP Test Script Recorder Settings window. You will observe that there are 3 types of Settings that need to be done:
1. Global Settings: This has 2 fields:
2. Test Plan Content: There are 3 fields:
3. HTTP Sampler Settings:
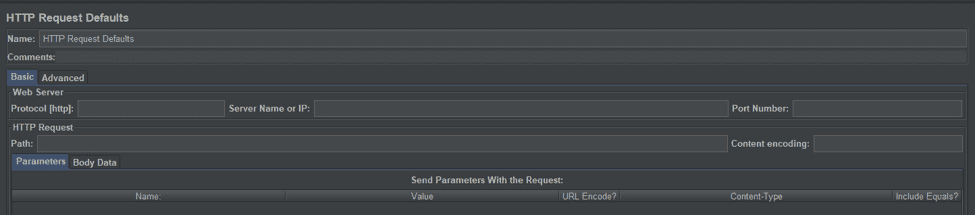
4. In the HTTP Request Defaults element:
Clicking on the Start button will start the JMeter Proxy Server to intercept the browser requests. Please Note this setup was for HTTP Requests. For HTTPS Requests you need to set up JMeter CA Certificate.
If any user enters the URL that is not HTTP. JMeter will show a message that
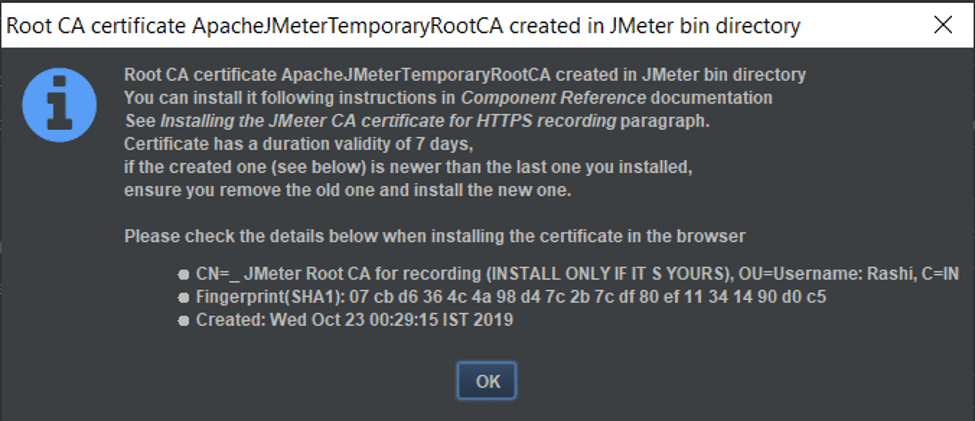
Root CA Certificate is created in JMETER_HOME/bin directory. You need to install this certificate in your browser. The validity of this certificate is 7 days. In the next blog post, we will be discussing with you how to install the ROOT CA Certificate and will also tell you a hack to increase the validity of this certificate so that you don't need to update it after every 7 days.
Configure Browser to use JMeter Proxy
We need to accept, install and trust JMeter's Root Certificate to allow JMeter's Proxy to decrypt HTTPS Traffic. Be cautious and don't ever leak your Root Certificate to any third party. Otherwise, the Root Certificate is very secure.
The majority of users these days use 2 browsers most commonly: Mozilla Firefox and Google Chrome. In this article, we will be discussing how to configure the browser to use JMeter Proxy in these 2 browsers only. So, let's get started.
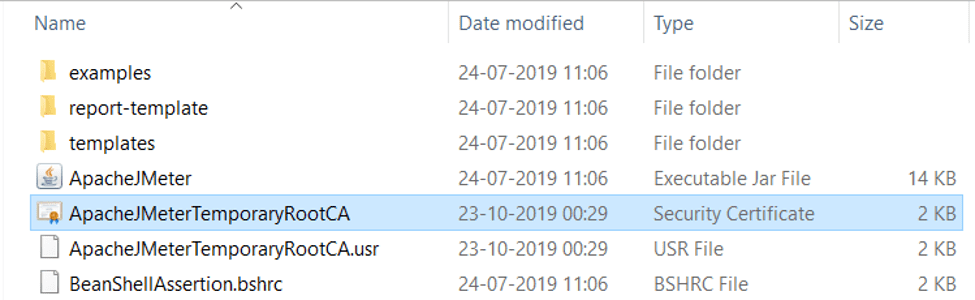
JMeter generates and saves Jmeter's Root Certificate Authority within the JMETER/HOME/bin folder. You should be able to find a file name ApacheJMeterTemporaryRootCA.crt in this folder. As you can see from the screenshot below.
By default, the validity of this Root CA Certificate is 7 days. But there is a hack to deal with this. Follow the steps below:
#The default validity for certificates created by JMeter
_ #proxy.cert.validity=7_
#The default validity for certificates created by JMeter
#proxy.cert.validity=365
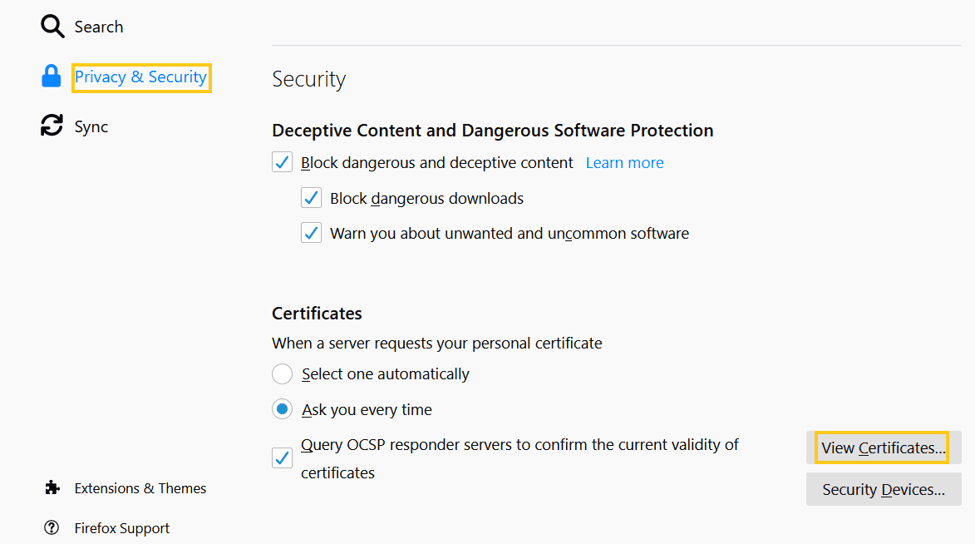
Firefox Setup
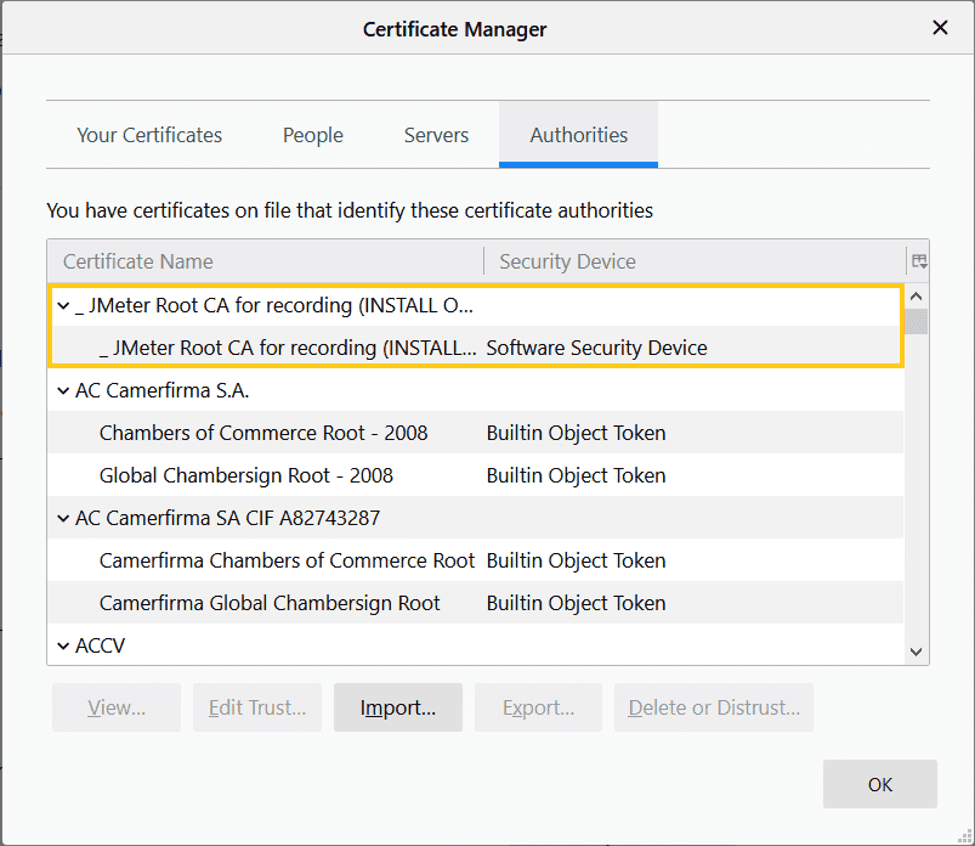
To install JMeter's Trusted Root Certificate Authority in Firefox, follow the following steps:

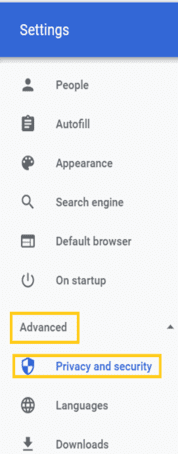
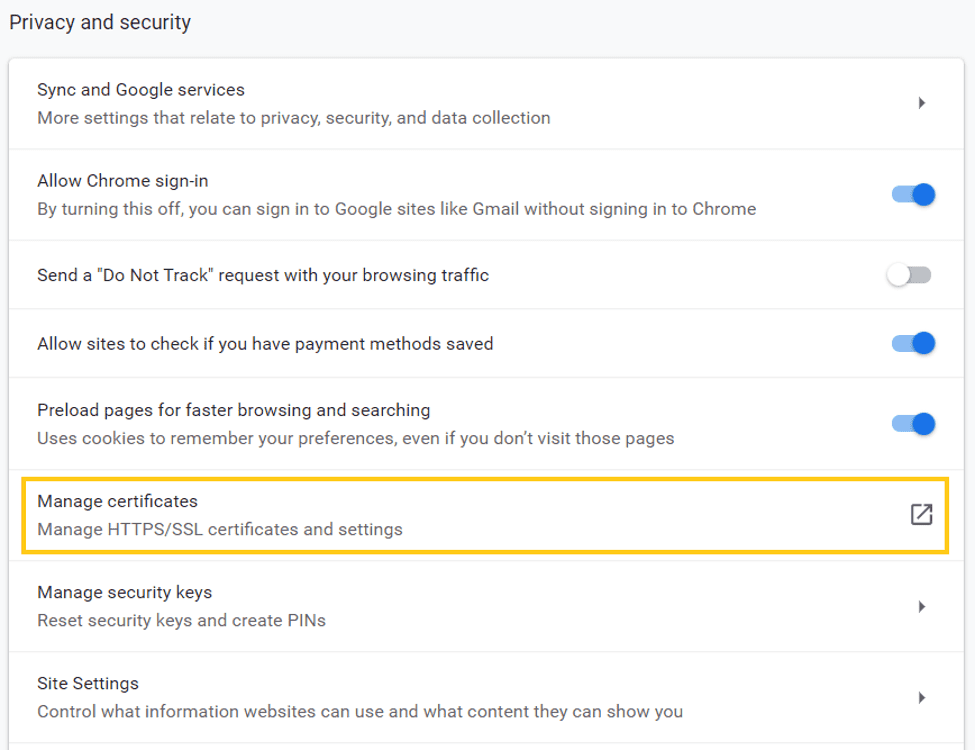
Google Chrome Setup:
Let's go through the steps to install the Root Certificate in Google Chrome.
Recording the interactions
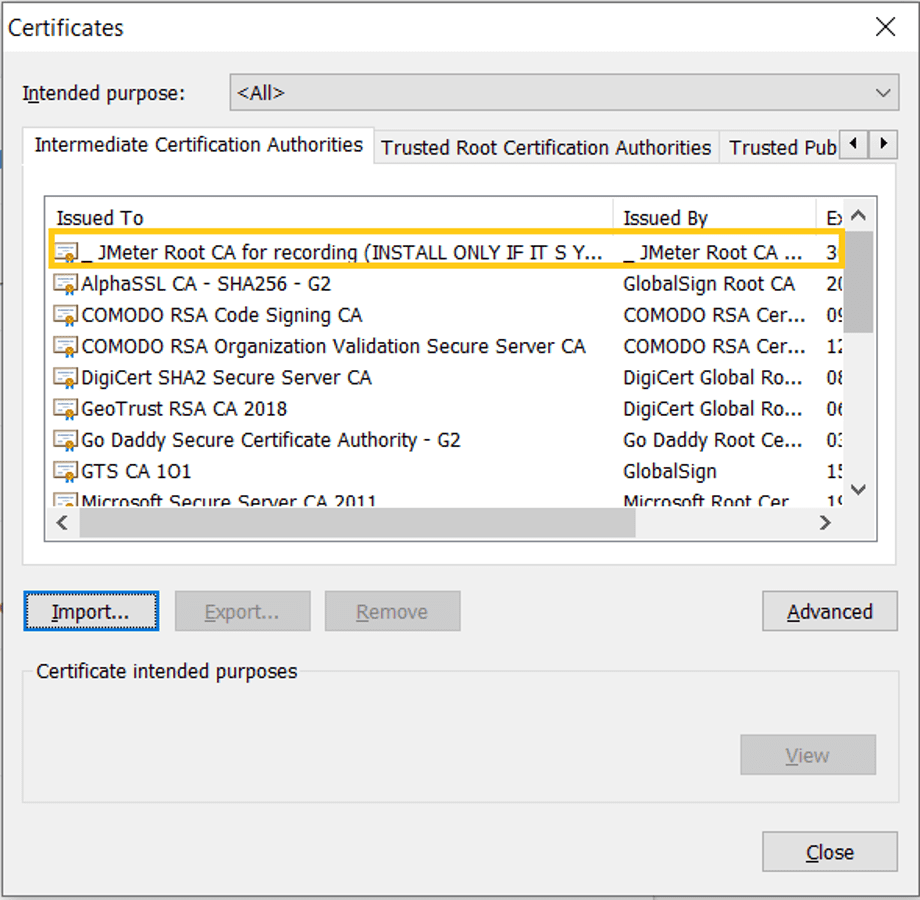
NOTE: You have an option to change the category of the certificate at the time of installation from Intermediate Certification Authorities to any other category.
2020 / 2 / 27
2020 / 2 / 27
2020 / 2 / 27
2020 / 2 / 27
2020 / 2 / 27


What is Agile Methodology in SDLC

Introduction to Apache JMeter - A Quick guide